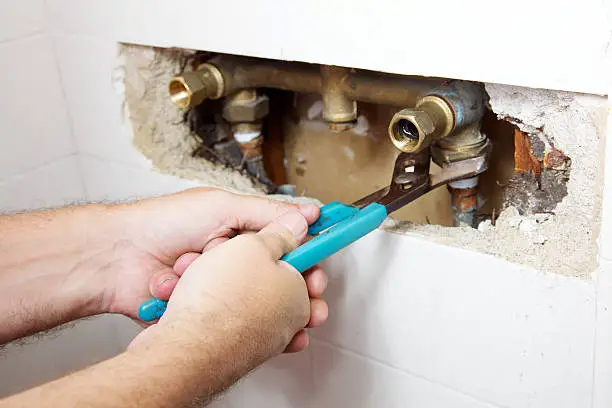
A leaky shower head can be a pesky problem that not only wastes water but also increases your utility bills. If you’re dealing with a shower leak, you’re not alone. Many homeowners face this issue at some point. Fortunately, addressing a shower leak is often a simple task that you can tackle with a few tools and some basic know-how. In this blog, we’ll guide you through the steps to fix a shower head leak and prevent it from happening again.

Identifying the Source of the Shower Leak
Before you start fixing the leak, it’s important to identify its source. A shower leak can originate from various places, including the shower head itself, the connection between the shower arm and the wall, or even the faucet. Here’s how to locate the source of the leak:
- Inspect the Shower Head: Turn on the shower and observe where the water is leaking. If water is dripping from the shower head even when it’s turned off, the problem might be with the shower head or the valve.
- Check the Connections: If the shower head is not the issue, check the connections where the shower arm meets the wall. Water seeping from this area indicates a problem with the connection or the pipe inside the wall.
- Examine the Faucet: If the shower head and connections seem fine, the leak could be originating from the faucet. Leaking faucets can cause water to drip from the shower head even when it’s turned off.
Fixing a Leaky Shower Head
If you’ve determined that the shower head is the source of the leak, follow these steps to fix it:
Step 1: Turn Off the Water Supply Before you start any repair work, make sure to turn off the water supply to the shower. This will prevent any accidental water damage and make the repair process easier.
Step 2: Remove the Shower Head Use a wrench to carefully unscrew the shower head from the shower arm. If the shower head is stuck, wrap a cloth around it to avoid scratching the finish and use the wrench to gently loosen it.
Step 3: Inspect the Shower Head Once the shower head is removed, check the interior for any signs of damage or mineral buildup. Mineral deposits can cause a shower leak by preventing the shower head from sealing properly. Soak the shower head in a mixture of vinegar and water to dissolve any buildup.
Step 4: Replace the Washer or O-Ring Most shower heads have a rubber washer or O-ring that helps create a watertight seal. Over time, these components can wear out and cause a shower leak. Replace the washer or O-ring with a new one from your local hardware store.
Step 5: Reassemble the Shower Head After cleaning and replacing any worn parts, reassemble the shower head and screw it back onto the shower arm. Use plumber’s tape on the threads to ensure a tight seal and prevent future leaks.
Step 6: Test the Shower Head Turn the water supply back on and check for leaks. If water is still leaking, double-check the connections and ensure everything is tightened properly.
Fixing a Leaky Shower Arm Connection
If the leak is coming from the connection between the shower arm and the wall, follow these steps:
Step 1: Turn Off the Water Supply As with the shower head repair, start by turning off the water supply to the shower.
Step 2: Remove the Shower Arm Use a wrench to unscrew the shower arm from the wall. Be careful not to damage the pipe inside the wall.
Step 3: Inspect the Threads Check the threads on both the shower arm and the pipe inside the wall for any damage or debris. Clean the threads with a wire brush if necessary.
Step 4: Apply Plumber’s Tape Wrap plumber’s tape around the threads of the shower arm to create a watertight seal. Make sure to wrap the tape in the direction of the threads to ensure it stays in place when you reattach the shower arm.
Step 5: Reattach the Shower Arm Carefully screw the shower arm back into the wall. Use a wrench to tighten it, but avoid over-tightening, which can cause damage.
Step 6: Test the Connection Turn the water supply back on and check for leaks. If the shower leak persists, you may need to replace the shower arm or consult a professional plumber.
Preventing Future Shower Leaks
Preventing a shower leak is easier than fixing one. Here are some tips to help you avoid future leaks:
- Regular Maintenance: Periodically check your shower head, connections, and faucet for signs of wear and tear. Replace any worn parts promptly.
- Clean Regularly: Mineral buildup can cause leaks, so clean your shower head regularly with a vinegar solution to prevent clogs and ensure a proper seal.
- Use Quality Parts: Invest in high-quality washers, O-rings, and plumber’s tape to ensure long-lasting repairs and prevent future leaks.
- Proper Installation: Ensure that all connections are properly tightened and sealed during installation to avoid leaks.
By following these steps and tips, you can address a shower leak effectively and keep your bathroom in top condition. Remember, a little maintenance goes a long way in preventing leaks and ensuring your shower functions smoothly.
FAQs
What are the common signs of a shower head leak?
Common signs include water dripping from the shower head when it’s turned off, a decrease in water pressure, or water stains on the walls or ceiling near the shower. You might also notice an increase in your water bill.
Can I fix a leaking shower head myself?
Yes, many shower head leaks can be fixed with some basic tools and a little know-how. Common fixes include replacing worn-out washers or O-rings, cleaning mineral buildup, and tightening connections.
